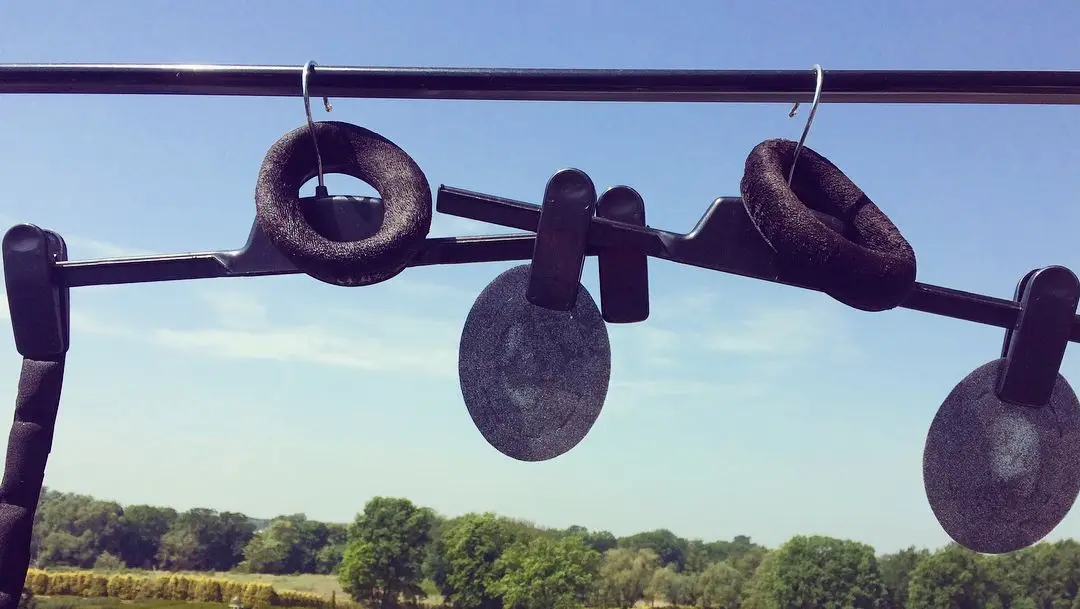
Headphones are one of those gadgets we use daily in our leisure time and enjoy music, so cleaning them once a week is necessary to keep them in optimum condition in both sound quality and hygiene perspectives. Nowadays they are also costly and there are a lot of germs in our surroundings so the best practice is to clean your headphones properly. In this guide, I will explain How to clean headphone pads to eliminate germs, ear wax, and dust at the same time.
This comprehensive guide dives deep into everything you need to know about cleaning your headphone pads, and ensuring your favorite audio companions stay fresh and functional for years to come.
Understanding Your Ear Pads: Material Matters
The first step to proper cleaning is identifying the material of your ear pads. Different materials require slightly different cleaning approaches. Here’s a breakdown of the most common types:
- Fabric (Velour, Alcantara): These soft, breathable fabrics often come with over-ear headphones. They’re comfortable but prone to trapping dust and hair. As used in Beyerdynamic DT 880 Pro, DT 990 Pro and you can also see the company guide about cleaning their headphones.
- Leather: Leather and its synthetic cousin, pleather, offer a luxurious feel and good noise isolation. However, they can attract oils and sweat.
- Memory Foam: This plush material conforms to your ears for a perfect fit. However, it can be trickier to clean as it absorbs moisture easily.
What Tools do I Need to Clean the Headphones?
Before diving in, gather the necessary tools for a successful cleaning mission:
- Microfiber Cloth: This gentle cloth won’t scratch or damage your ear pads.
- Mild Dish Soap: Opt for a gentle, fragrance-free dish soap.
- Soft Bristled Toothbrush (Optional): For stubborn grime on fabric pads.
- Alcohol Wipes: For cleaning alcohol is best for removing germs.
- Bowls (Optional): For a more thorough cleaning with removable pads.
- Distilled Water (Optional): For rinsing after soap cleaning (important for leather pads).
Prepping for the Clean: Safety First
- Consult the Manual: Always check your headphone manufacturer’s instructions for specific cleaning recommendations. Some high-end models might require special care.
- Power Down: Turn off your headphones and unplug them from any devices.
- Detach Pads (Optional): If possible, detach the ear pads for a more thorough cleaning. Consult your manual for removal instructions here you can see the Bose Manual for replacing the ear cushions.
How To Clean Headphone Pads
Now comes the fun part: cleaning those ear pads! Here’s how to tackle different materials:
Fabric Pads:
- Soft Brush: Start by removing dust, hair, and other loose debris with a soft bristle brush.
- Damp Microfiber Cloth: Dampen the microfiber cloth with a very small amount of soapy water. Wring it out thoroughly to ensure it’s barely damp, not soaking wet.
- Gentle Wiping: Gently wipe the surface of the ear pad in circular motions. Avoid scrubbing or applying excessive pressure.
- Air Drying: Lay the ear pads flat (ideally on a clean towel) in a well-ventilated area to air dry completely. Avoid direct sunlight or heat sources.
Let us take an example of AirPods Max which we can clean with the usage of household things like the below process with the help of pictures.
- First, you have to detach the pads from the Airpods
- Then take the soft bristle brush in the pic and clean the complete gadget.
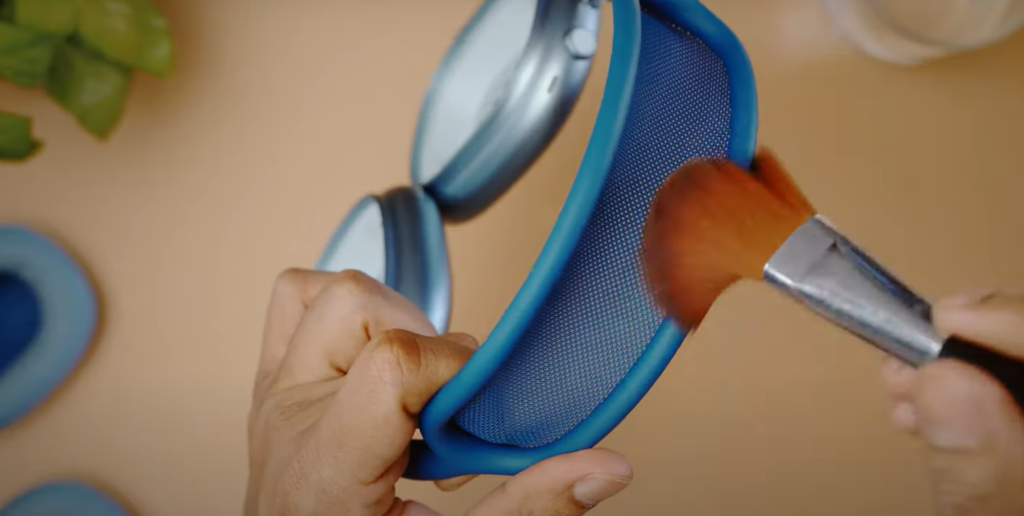
- Then take a microfiber cloth like this and clean the entire headphones to remove any remaining debris
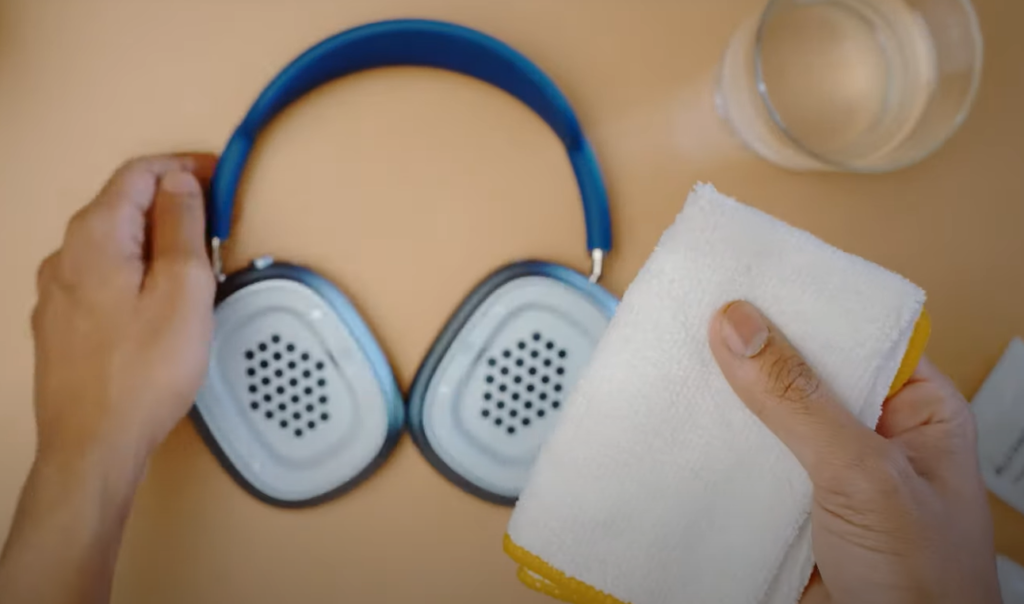
- Now take some alcohol wipes and clean the speaker area of headphones to remove any microdust as they are wet enough to remove the dust simultaneously without damaging the electric parts.
- In last take some detergent I would prefer liquid detergent and mix it with water take the microfiber cloth and clean the ear pads as they are detached and it will be safe for wet cleaning after cleaning let them dry for 24 hours as recommended by Apple Manual then you can attach them.
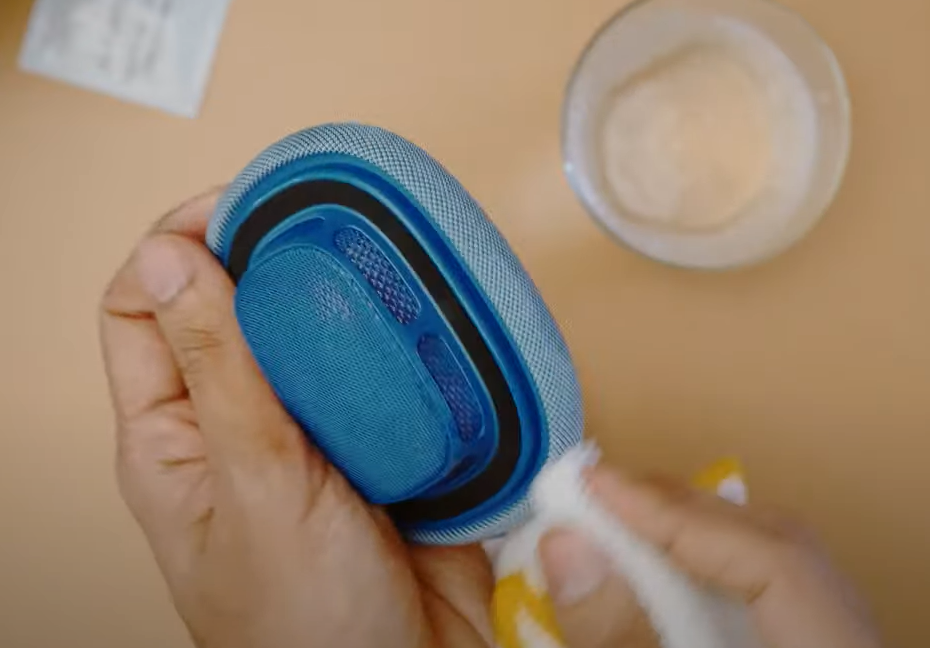
For JBL headphones you have to repeat the same procedure and for more info, you can see their manufacturer guide also.
Leather Pads (Pleather and Alcantara):
- Microfiber Cloth: Lightly dampen the microfiber cloth with clean water.
- Wiping Motion: Wipe the surface of the ear pads in circular motions. Avoid using soap, as it can dry out the leather.
- Spot Cleaning: For stubborn stains, use a cotton swab dipped in a small amount of rubbing alcohol (isopropyl alcohol). Test on a hidden area first to ensure no discoloration.
For example, let’s talk about Sony’s 1000xm3 ear pads
Its pads are made of leather and detachable, they are 6 hooks that you have to unpin first for that purpose you can use a spoon and unpin them gently like the following pic
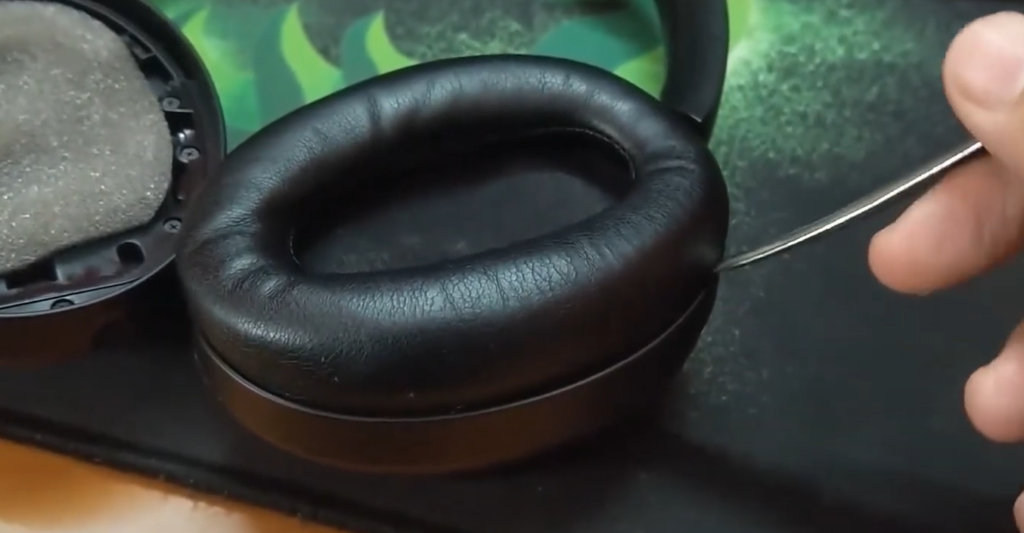
After removing the leather pad you can thoroughly clean the entire pad with cotton swabs or you can use some mild detergent as mentioned on the Manufacturer’s website after cleaning the difficult task is to attach the pad again gently so that it returns to its original condition, there are six hooks like shown in the following pic.
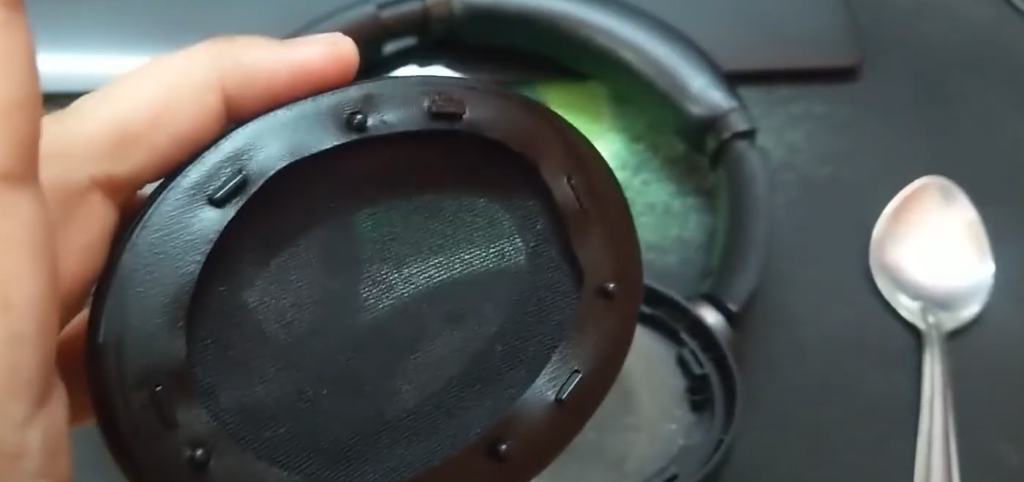
You have to locate them on the pads plus their cover and pin them again gently and that’s how you will get your pads in optimum condition again.
Memory Foam Pads:
- Lint Roller: Start by removing loose debris with a lint roller.
- Air Drying: Since memory foam can absorb moisture, focus on air drying. Lay the headphones flat on a clean towel in a well-ventilated area. Sunlight can damage memory foam, so keep them in a shaded spot.
Post-Cleaning Pampering (Optional) for Leather Ear Pads:
Leather ear pads, while luxurious, can dry out over time. Here’s how to add some TLC after cleaning:
- Leather Conditioner: Invest in a good quality leather conditioner specifically designed for headphones. Avoid using furniture polish or harsh chemicals.
- Small Dabs: Apply a small dab of conditioner onto a clean microfiber cloth.
- Buffing Motion: Gently buff the leather pad in a circular motion with the conditioner. A little goes a long way, so avoid over-applying.
- Drying Time: Allow the conditioner to dry completely before using your headphones again.
Cleaning the Rest of the Headphones:
While ear pads receive the most attention, don’t neglect the rest of your headphones! Here’s a quick rundown:
- Headband: Wipe down the headband with a damp microfiber cloth to remove sweat and grime.
- Headphone Exterior: Use a dry microfiber cloth to wipe down the exterior of the headphones. Pay attention to crevices and buttons.
- Driver Grilles (Optional): If your headphones have removable grilles, use a soft brush or compressed air to remove dust buildup from the drivers.
How Do You Clean A Headphone Jack
The culprits behind a clogged headphone jack are usually tiny: dust, lint, and other debris. These can accumulate over time, preventing your headphones from making a proper connection. Pockets, bags, and even your ears can contribute to this buildup.
Safety First:
Before diving in, prioritize safety:
- Power Down: Turn off your device and unplug it from any power source. This minimizes the risk of electrical shock.
- Gather Your Arsenal: You’ll need a few gentle tools:
- Compressed Air Can: This is your best friend for dislodging loose debris.
- Cotton Swab: Opt for swabs with a tightly wound cotton tip to avoid leaving fibers behind.
- Small Flashlight (Optional): For a better look inside the jack.
- Masking Tape (Optional): For a sticky solution to stubborn debris.
Gentle Techniques: Clearing the Blockage
Now, onto the cleaning process:
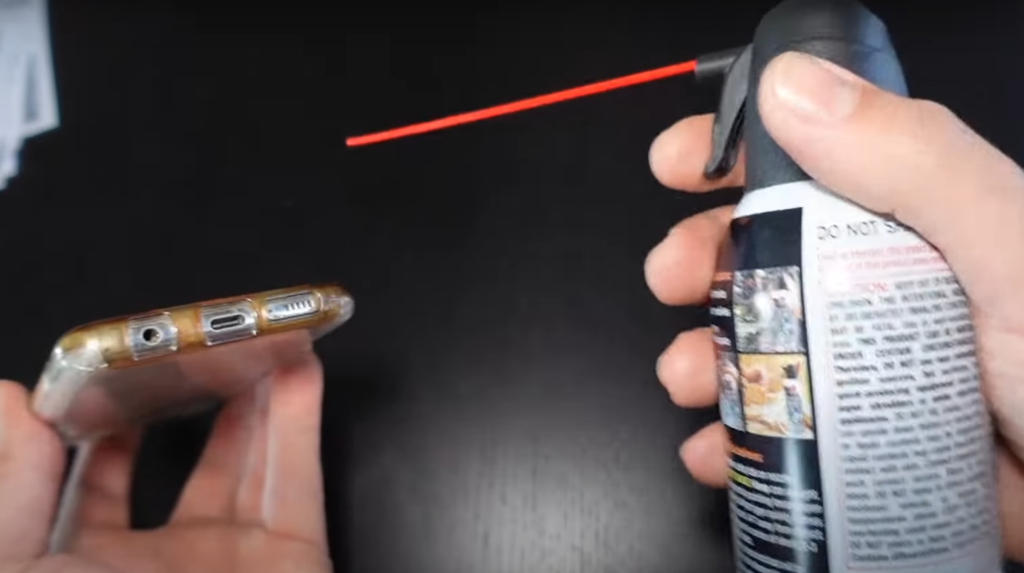
- Start with a Blast: Use short bursts of compressed air to dislodge any loose dust or lint. Hold the can upright and aim the nozzle at the jack opening, keeping a safe distance, as you can see in the following picture.
- Wooden Tooth Pick: Take a wooden toothpick( shown in the picture)
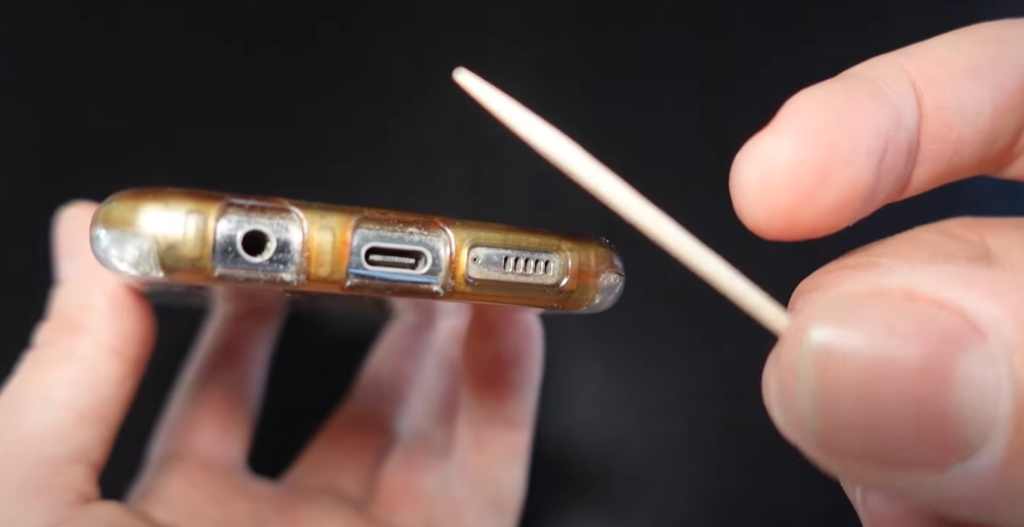
Don’t use a metal one as they can damage the metal net inside and then your motherboard, and try to take the dust or wax out of the jack, and after getting the was out use the compressed air again to clean the remaining debris.
- The Swab Shuffle: If compressed air doesn’t do the trick, take a cotton swab. Important: Don’t use a wet or alcohol-soaked swab, as this can damage the delicate components inside the jack. Carefully roll the dry cotton swab around the tip of your finger to tighten it and prevent fibers from detaching. Gently insert the swab a short distance into the jack and rotate it slowly to pick up debris. Avoid pushing the swab deep inside!
- The Sticky Solution (Optional): For particularly stubborn debris, try a small piece of masking tape wrapped around the end of a toothpick (sticky side out). Carefully insert it into the jack and slowly remove it, trapping any dirt or lint.
Repeat and Reassess:
After each cleaning step, try plugging in your headphones to see if the sound has returned. If not, repeat the process gently, being mindful not to force anything.
When Professional Help is Needed:
If you’ve exhausted these gentle methods and your headphone jack remains clogged, it’s best to seek professional help. A phone repair technician can safely inspect the jack and remove any deeply lodged debris or diagnose more serious issues.
What Should Be The Frequency Of Cleaning Headphones
The frequency of cleaning depends on how often you use your headphones and how sweaty you get. A good rule of thumb is to:
- Weekly Wipe Down: Use a damp microfiber cloth for a quick weekly wipe-down, especially if you use your headphones frequently.
- Deep Clean: Perform a deeper clean with soapy water or a leather conditioner every 1-2 months.
How To Prolong the Life of Headphones
Here are some additional tips to keep your ear pads fresh and functional for longer:
- Store Properly: Store your headphones in a cool, dry place when not in use. Avoid extreme temperatures and humidity.
- Air Out Regularly: Let your headphones air out for a few minutes after each use, especially if you sweat heavily.
- Clean Hands: Wash your hands before using your headphones to minimize dirt and oil transfer.
- Replace When Needed: Ear pads wear out over time. If they become cracked, flattened, or lose their shape, consider replacing them for optimal comfort and sound quality.
Conclusion:
In this article, I have tried to clear everything you can do to clean your headphones and their jack and to ensure that every problem is encountered and you have no problem in taking care of your expensive device.
By following these simple cleaning techniques, you can ensure your headphones stay comfortable, and hygienic, and deliver the best possible sound quality for years to come. Remember, a little care goes a long way in keeping your favorite audio companions in top shape. So, put on your favorite tunes, grab your cleaning supplies, and give those ear pads some love!
In the comment section, you can let us know about your routine and if you want to add something please let us know.

I am Michael a Texas-based recording engineer and sound enthusiast. I contribute to Headphones Pedia’s efforts to educate readers about intriguing new devices and other audio-related issues by drawing on their experience working on several sound projects. I also use AI tools to assist with content creation.
